Showing posts with label beauty. Show all posts

Sunday, January 19, 2020

Flat Iron + Chat With Me: Relaxer Day Update and Naturals Going Back To Relaxers in 2020?!?!


Hey guys! My relaxer update video just dropped. In this video, I share with you my relaxer update (relaxed at 12 weeks post relaxer), flat iron process, and chat with you guys about the wave of naturals going back to relaxed hair! YASSSS...we are going to discuss this. 

Be sure to leave a comment on the video and let me know your thoughts on this topic. Do you predict more naturals will be relaxing their hair in 2020? I’ve been noticing it a lot lately so let’s talk about it! Hope you enjoy!!

Oh, and don't forget to LIKE & SUBSCRIBE :) Thank you for watching.

Products Mentioned:

ORS Olive Oil Relaxer - https://amzn.to/2ujlG2P
ORS Olive Oil Neutralizing Shampoo - https://amzn.to/2tx6sHB
Olaplex Treatment No. 3
Creme of Nature Breakage Defense Bond Mender
Keracare 1st Lather Shampoo - https://amzn.to/2RuVytP
Keracare Hydrating Detangling Shampoo - https://amzn.to/2NB7wRF
Joico Moisture Recovery Treatment Balm - https://amzn.to/376VTK0
Tresseme Keratin Smooth Flat Iron Heat Protection Spray - https://amzn.to/379gEoj
Creme of Nature Argan Oil Buttermilk Hair Milk - https://amzn.to/2NHkm0z

Tools used:

Wide tooth comb - https://amzn.to/2NqP659
Flat Iron - Sedu Revolution 


Xoxo

Flat Iron + Chat With Me: Relaxer Day Update and Naturals Going Back To Relaxers in 2020?!?! first published on Hairlicious Inc.

Monday, January 13, 2020

2020 is here! Time to Boss Up My Hair Care Game!

“2020

Happy New Year!! 2020 is here and it’s all about levelling up and getting to those goals - hence my “Boss” hair clip above. 2020 = Time to Boss Up. In 2019, my hair was definitely at its healthiest - which I’m very proud of. I remained consistently consistent with my regimen, kept things simple and as a result I was able to retain a lot of length even though I cut my hair to almost arm pit length. I attribute that success to tried and true practices I’ve implemented over the years and I’ll continue to share those tips and tricks with you. 

In 2019, I found and implemented great products (Olaplex, Creme of Nature Bond Mender etc.) and will continue to use them in my hair regimen. This year I plan to “boss up” my healthy hair care game/journey by sticking to what works (products and methods) of course, perhaps even simplifying a few of my routines but also trying out products that have been on my hair care wish list - I’ll share this list with you later!

As of now, my main focus is set on maintaining the health of my hair, sharing more tips and tricks with you guys, and last but not least...reaching waist length! Yesss girl! Time to Boss up and reach waist length. I’ve always loved and maintained mid back length hair. It’s been my happy place.  But since it’s 2020...why not?! Plus it’s the hubby’s request *wink* LOL. I’ll honour it...it’s the only right thing to do! 

So with that being said, I feel a hair challenge coming on....

Drop a comment and let me know which hair challenge we should kick off? Castor Oil Challenge? Protective style challenge? ...let me know!

Xoxo 

2020 is here! Time to Boss Up My Hair Care Game! first published on Hairlicious Inc.

Tuesday, January 7, 2020

How to massage your scalp

how to scalp massage

Here on Hair Romance, I share lots of tips for different products and styling your hair, but there’s a fundamental technique you need to know. It’s my number one tip for growing beautiful, healthy hair.

I’m talking about giving yourself a head massage.

Not only does it encourage blood-flow to your scalp and hair follicles, which stimulates hair growth, it also helps with follicle health, sebaceous oil production and healthier hair. It also feels great and helps you relax and destress – and who doesn’t need that?

How to massage your head and scalp

Click here if you can’t see the video above.

Your head is the easiest part of your body for you to massage yourself so there are no excuses. Alternatively, this is something that you can do with a friend or your kids and it’s a great way to connect with your partner.

But whether you’re doing this alone or with someone else, head massages should be a part of your daily hair routine. I like to massage my scalp at the end of the day, so it doubles up as a bit of stress relief too.

how to scalp massage

Working with oil or without, divide you head roughly into quarters and gently massage each section. You can massage your scalp either with one hand or both. Then finally finish by massaging the base of your neck.

If you’re finding your hair gets tangled as you massage, don’t try and drag your fingers through your hair. You’re likely to cause breakage and knots – and ultimately undo all the relaxing feels from the massage too! Working in small sections in key.

Gently extract your fingers from your hair and go in again fingertips first. Of course, head massages are likely to mess up any styling you have, which is why I like to do this at the end of the day.

Head massages with hair oils

If you are using hair oil, remember you only need a couple of drops for your whole head. One of the most common mistakes people make with products like oils is to use too much.

Check out my story and video on how to use hair oils here. If you’re looking for recommendations on brands to use, I also have information on which hair oils I like here too, but one of my favourite hair oils for head massages is Darshana.

So with a couple of drops on the ends of your fingers, massage the oil into your scalp in small circular motions. At the end of each of the four sections of your head, gently run your fingers through the mid-lengths of your hair to distribute some of the oil.

I know we don’t have much free time, but you can even do this while you’re watching TV or as you are settling into bed. Even if you’ve only got a minute to do it, make it part of your hair routine.

Start doing this now and let me know if you see and feel a difference. I’d love to hear back at the end of a few weeks when you notice the difference in your hair.

The post How to massage your scalp appeared first on Hair Romance.


How to massage your scalp first published on Hair Romance

Monday, January 6, 2020

When do you use hair oils?

When it comes to hair treatments hair oils can be quite confusing as products. But if you’ve tried hair oils and they haven’t worked, it might because you’re not using them the right way.

Alternatively, it might be because you haven’t found the right hair oil for you or it’s one that’s not right for your hair’s needs.

To help with this dilemma, I’m answering some questions about when you should use hair oils in your hair routine and what types of oils are best for your hair. I’ll also be exploring oils that are actually oil blends and whether these are okay too.

You can check out my video on hair oils that’s part of my Hair Q&A series, which is all here on my Hair Romance channel.

When should I use hair oils?

Click here if you can’t see the video above.

When to use hair oils

Oils can nourish your hair, but remember that oil and water don’t mix, so if you want to moisturise your hair, you need to add water first and then seal it in with oil.

It might seem counterintuitive, but adding water to the treatment is often a step that’s left out and it’s one that makes all the difference to the end result.

The key is to to hydrate your hair first and then capture that with oil.

If you have fine hair, you can still use a hair oil treatment without your hair ending up limp and lank from too much oil.

The trick for fine hair is to do an oil treatment before you shampoo. This way, you won’t have a heavy residue in your hair from the oil, but you’ll still get a beautiful scalp and hair treatment.

Head massages

When you’re giving yourself a head and scalp massage, this is a great time to use hair oils.

You can use any natural oil for this, it just depends on your hair. I find heavier oils like coconut oil are too much and I need to shampoo them out at the end.

I prefer to use light almond oil or jojoba oil, which is light enough to leave in your hair, especially if your hair is dry.

Add some shine

Oils are a great way to add shine to your hair and you only need a couple of drops to do this.

Once you’re happy with the finished style, mix one or two drops of oils in your hands and smooth it over your hair. You cna twist it through your curls to highlight them too.

Less is more when adding oil to dry hair. And note that while hair oil can smooth down some flyaways, too much oil just makes your frizz shiny too.

What if I’ve used too much oil in my hair?

If you have time, it’s probably best to pop in the shower, shampoo your hair and start again.

But if you need a quick fix, here’s what you do:

I recommend using a little dry shampoo or hair powder. Going with a matte powder product will help absorb some of the excess oil in your hair and put some body back into your hair that’s feeling a bit weighed down by the oil.

Then you can quickly restyle and you’re good to go. It may not feel the nicest, but it will look a lot better and get you through an over-oiled bad hair day in minutes.

What about oil blends?

Hair oils had a real moment when Moroccanoil launched their argan oil, and every brand followed them.

Although labelled as an oil, these are oil blends, usually with a base of silicones.

If you follow the Curly Girl Method, these are ones to avoid but if you use shampoo, they’re easily washed out and they can perform very well to smooth and add shine.

I wouldn’t use an oil blend for head massages but for styling they are a great choice.

My fave hair oils & blends

Do you like using oils in your hair? Which oils are your favourite?

The post When do you use hair oils? appeared first on Hair Romance.


When do you use hair oils? first published on Hair Romance

Wednesday, December 25, 2019

Flat Twist Protective Style | Relaxed Hair


Merry Christmas!! Wishing you and your family an amazing Holiday filled with love!


In this video I share how I do my flat twist protective style. I love wearing this style when I’m stretching my relaxer because my new growth gives me so much volume and texture for my flat twist. This is a great daily style, perfect for an event and for the Holiday season!

Of course, this protective style keeps my relaxed hair moisturized as my ends are safely tucked away. Hope you enjoy!!

As always, thanks for watching! Oh, and don't forget to LIKE & SUBSCRIBE :)

xoxo
Flat Twist Protective Style | Relaxed Hair first published on Hairlicious Inc.

Saturday, November 30, 2019

How to massage your scalp

Here on Hair Romance, I show lots of tips for different products and styling your hair, but there’s a fundamental technique I want to show you. It’s my number one tip for growing a beautiful healthy hair and also for using products like hair oil more effectively.

I’m talking about giving yourself a head massage.

Not only does it encourage blood-flow to your scalp and hair follicles, which stimulates hair growth, it also helps with follicle health, sebaceous oil production and healthier hair. It also feels great and helps you relax and destress – and who doesn’t need that?

How to massage your head and scalp

Click here if you can’t see the video above.

Your head is the easiest part of your body for you to massage yourself so there are no excuses. Alternatively, this is something that you can do with a friend, your partner or your kids and it’s a great way to connect.

But whether you’re doing this alone or with someone else, head massages should be a part of your daily hair routine. I like to massage my scalp at the end of the day, so it doubles up as a bit of stress relief too.

Working with oil or without, divide you head roughly into quarters and work in each section either with one hand or both, then finally finish by massaging the base of your neck.

If you’re finding your hair gets tangled as you massage, don’t try and drag your fingers through your hair. You’re likely to cause breakage and knots – and ultimately undo all the relaxing feels from the massage too.

Gently extract your fingers from your hair and go in again fingertips first. Of course, head massages are likely to mess up any styling you have, which is why I like to do this at the end of the day.

Head massages with hair oils

If you are using hair oil, remember you only need a couple of drops for your whole head. One of the most common mistakes people make with products like oils is to use too much. This will of course make your hair look and feel oily and limp.

I recommend using Darshana hair oil. The important thing to remember is hair oil is more a ‘scalp oil’, and is full of nutrients that are good for your scalp rather than your hair.

So with a couple of drops on the ends of your fingers, massage the oil into your scalp in small circular motions. At the end of each of the four sections of your head, gently run your fingers through the mid-lengths of your hair to distribute some of the oil.

I know we don’t have much free time, but you can even do this while you’re watching TV or as you are settling into bed. Even if you’ve only got a minute to spare, just take as much time as you can.

Start doing this now and let me know if you see and feel a difference. I’d love to hear back at the end of a few weeks to see how your hair is looking.

The post How to massage your scalp appeared first on Hair Romance.


How to massage your scalp first published on Hair Romance

Wednesday, November 13, 2019

High Bun Protective Style On My Relaxed Hair


My high bun tutorial is finally here. I absolutely love this high bun on days where I just don't feel like doing my hair. It's so simple to do and perfect to dress up for a special occasion or dress down for a comfy yet chic look. Too, my ends are tucked away and protected!!

Hope you enjoy and thanks for watching!!

xoxo


High Bun Protective Style On My Relaxed Hair first published on Hairlicious Inc.

Sunday, November 10, 2019

How to Pull Off the Gray Hair Trend

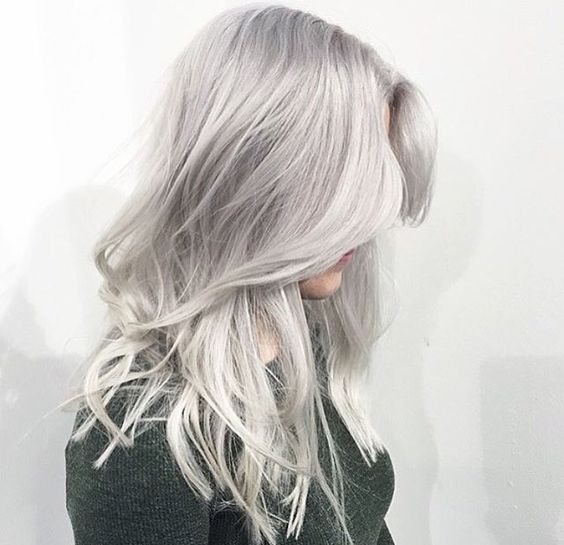
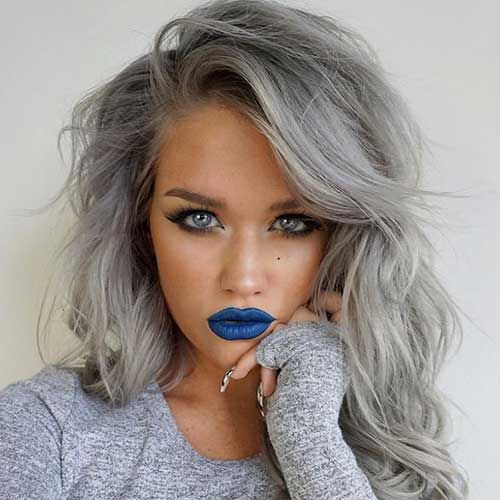
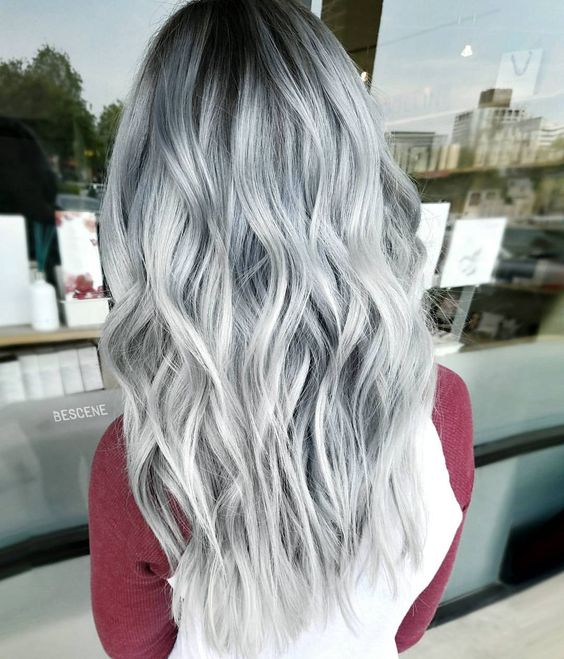
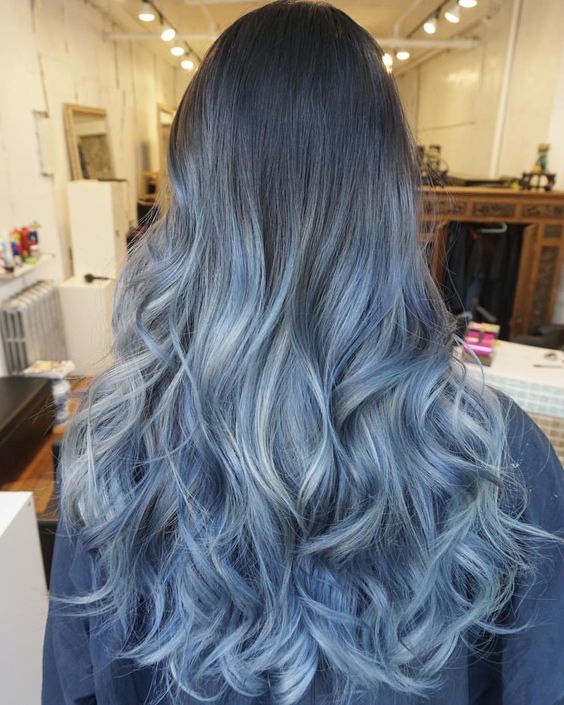
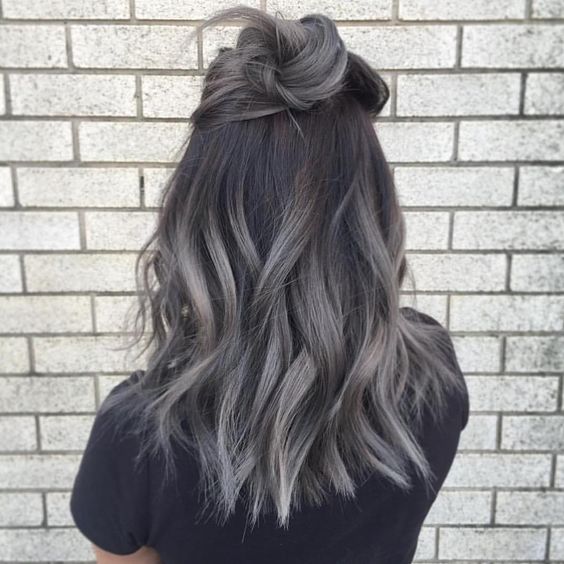
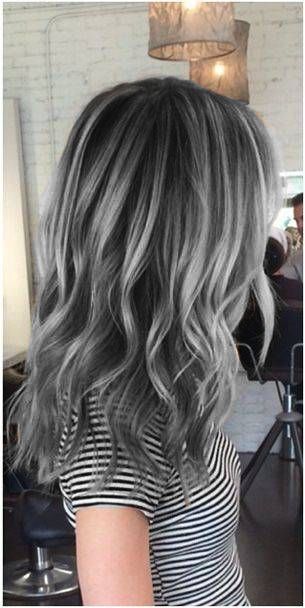
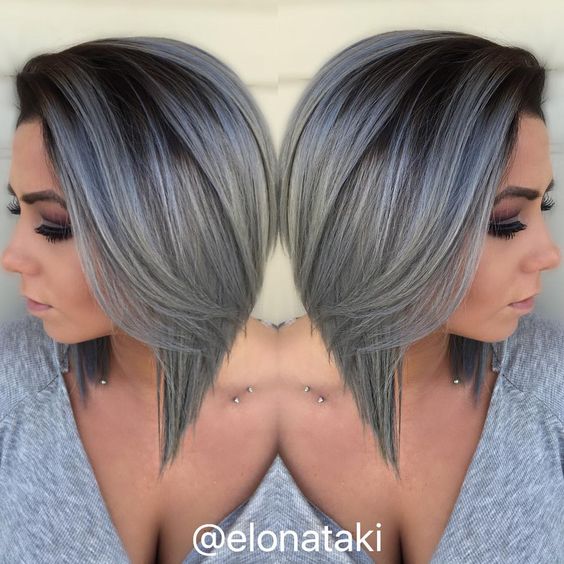
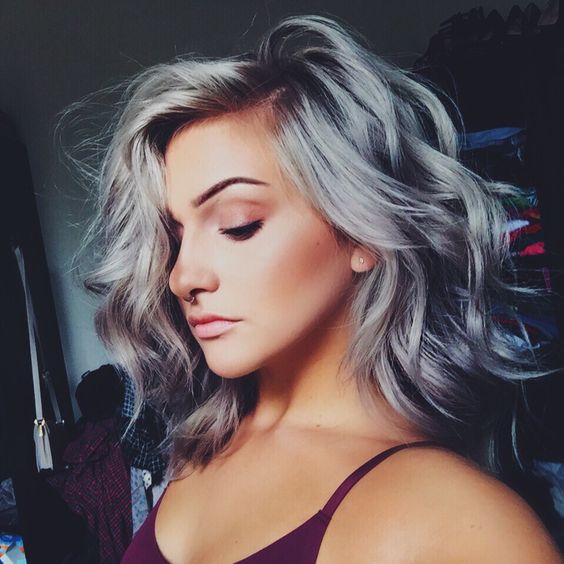
When most people think of gray hair, they probably think of something you can go to a salon to get covered up with dye. Interestingly enough, the latest trend in the beauty world is gray hair. Many young people who are not yet afflicted with natural gray strands are opting to intentionally dye their hair gray for a soft, cool finish. If you’re interested in trying out the gray hair trend, keep reading to learn how to pull off the gray hair trend correctly.

1. Go Cool Blonde

How to Pull Off the Gray Hair Trend

How to Pull Off the Gray Hair Trend

via

Rather than telling your hair stylist that you want gray or silver hair, opt for a cool blonde tone instead. A cool-toned platinum blonde color will give you the gray tint you’re looking for without appearing overpoweringly gray or silver.

2. Be Aware of Weakening

How to Pull Off the Gray Hair Trend

How to Pull Off the Gray Hair Trend

via

Unless you have naturally platinum blonde hair, dying your hair gray requires extensive bleaching beforehand. Bleaching your hair can be extremely damaging to your hair and can weaken it significantly.

If you are used to having strong, thick hair naturally, you need to be aware of the extensive damage that the chemical bleaching process can have on your hair before you jump right into the gray hair tend.

3. Keep Your Roots

How to Pull Off the Gray Hair Trend

How to Pull Off the Gray Hair Trend

via

If you have a warm skin tone, you might think that there’s no way you can pull off the gray hair trend. This is far from the truth. While gray or silver hair does complement cool skin tones more seamlessly than warm complexions, women who have warm-toned skin don’t need to feel excluded.

Instead of dying all of your hair gray or silver, ask your stylist to avoid coloring your roots and keep them the natural color of your hair. Keeping your roots natural and blending the gray down lower helps the gray shade look more natural against your warm skin.

4. Try Purple or Blue

How to Pull Off the Gray Hair Trend

How to Pull Off the Gray Hair Trend

via

If you’re interested in incorporating a fun color into your new hair, purple and blue are excellent cool colors that complement gray or silver hair flawlessly. Try adding purple or blue streaks, tips, or roots to your gray or silver hair to add a touch of adventurous fun to your new hairstyle.

5. Don’t Go All One Color

How to Pull Off the Gray Hair Trend

How to Pull Off the Gray Hair Trend

via

Dying your hair a blunt gray color is not likely to work out well. This is why dying your hair at home (at least for such a drastic color change) isn’t the best idea. Instead, go to a salon and request that they add a blend of different shades to your hair to create a more seamless, natural look.

6. Use the Right Products

How to Pull Off the Gray Hair Trend

How to Pull Off the Gray Hair Trend

via

Like any bleached, dyed, and processed hair, gray or silver hair requires special products to maintain successfully. Professional shampoos, conditioners, and styling products straight from your hair salon are more expensive than the products you can find at Target. However, they are usually your best bet for keeping your hair looking healthy and your color locked in. Ask your stylist what they recommend you purchase after your appointment to get the best, specialized advice.

7. Wait to Wash

How to Pull Off the Gray Hair Trend

How to Pull Off the Gray Hair Trend

via

Gray hair is one of the most difficult colors to hold in your hair. The trick is to make sure that your gray shade does not fade into a weird, blueish white mess. To achieve this, wait as long as possible before washing your hair immediately after you get it dyed. Waiting two to three days is a good start. After that, try to avoid washing your hair in extremely hot water; stick to lukewarm instead.

How to Pull Off the Gray Hair Trend

How to Pull Off the Gray Hair Trend

via
Before you go gray, use the tips in this post to learn how to pull off the gray hair trend flawlessly.


How to Pull Off the Gray Hair Trend first published on Hairstyles Weekly

Sunday, October 20, 2019

Fav Products Series - Keracare Hydrating Detangling Shampoo


Due to a lot of feedback/comments/questions etc. lately... I'm starting a new series "Fav♡ Products Series" on my Youtube Chanel where I will be sharing my favourite hair products/tools etc. with you.  I figured I'd start off with one of my favourite shampoo's - Keracare Hydrating Detangling Shampoo! In the video below I share why I love this shampoo, the benefits and how it makes my relaxed hair more manageable.

Promises:
Produces a rich lather to remove excess oil from the hair and scalp without stripping. Lightly conditions. Decreases interfiber friction to ease wet and dry combing. Repairs damaged areas and fly-away split ends. Moisturizes. Excellent for relaxed, permed or color-treated hair. Sulfate-free

Directions:
Wet hair thoroughly. Rub shampoo between palms and gently massage into a lather. Rinse and repeat. Proceed to deep condition with affirm or Keracare conditioner of choice.

Ingredients:
Water, Disodium Cocoamphodipropionate, Trideceth-7 Carboxylic acid, Cocamide MIPA, Disodium Laureth Sulfosuccinate, Polysorbate 20, Glycolstearate, Polyquaternium-7, Polyquaternium-10, Hydrolyzed Wheat Protein, Citric acid, Fragrance, Tetrasodium EDTA, Caprylyl Glycol, Phenoxyethanol, Benzyl Salicylate, Hexyl Cinnamal, Linalool, Alpha Isomethyl Lonone, Yellow #5 (CI 19140).

Truth:


Purchase: Keracare Hydrating Detangling Sulfate-free Shampoo - https://amzn.to/2BpzxF4

Thanks for watching!
Fav Products Series - Keracare Hydrating Detangling Shampoo first published on Hairlicious Inc.

Friday, October 4, 2019

Relaxer Update: Why I don't Relax 'Bone Straight'


Relaxer Update: Why I don't Relax 'Bone Straight' | www.Hairliciousinc.com

Happy Relaxer Day!

Don't you just love when this day rolls around? I love when relaxer day comes because #1, it resets my relaxer stretch and #2 it gives me a fresh start with no new growth to "baby" for several weeks. LOL. So, I ended my relaxer stretch at 12 weeks post and I got a trim! Can you believe its been 5 months since my hair cut? Time really does fly.

Today, I wanted to share with you 'Why I Don't Relax Bone Straight' and the benefits of not doing so.  I get comments/questions/messages from people who think I'm texlaxed because of the fullness of my hair - but I'm not. Again, just to clarify, I'm relaxed but not entirely bone-straight. Relaxed hair does N O T and should not be 100% bone-straight!

You see, I believe relaxed hair should be relaxed at 85-90% leaving some room for texture to remain in the strands. The whole point of relaxing is to relax the curl pattern so that it's straight but not to the point where the hair is stick thin, lifeless, limp and over-processed.

In fact, back when I first began my healthy hair journey, I noticed that many of the ladies who I admired had thick, long, healthy relaxed hair and they all had ONE of many things in common...they relaxed their hair leaving a tad bit of texture behind!!! To be clear, they were not texlaxed, but they had just enough wave/texture so that it wasn't super 100% straight. You get me? This was a HUGE game changer for me and the turning point in achieving healthier relaxed hair. Since that tip was shared with me, I never looked back!

OMGosh, flash back!

I remember, prior to my hair journey, when my hairdresser used to apply each and every one of my relaxers from root to tip and make me sit in the relaxer like a deep conditioner until my hair and ends were SUPER straight. I cringe just thinking about it - such a HOT MESS! Of course, my hair was thin, lifeless, constantly breaking and excessively dry!! I thought it was normal for relaxed hair to have those characteristics. I didn't know any better :(

Relaxer Update: Why I don't Relax 'Bone Straight' | www.Hairliciousinc.com
Freshly Relaxed - Air Dried Hair - September 2019

But as the saying goes "when you know better, you do better" - so let's fast forward.

Now that I self-relax (with the help of my sister) I control what relaxer strength I use, how long I leave my relaxer on for, how often I smooth/comb my new growth, my neutralizing process, how I protect my previously relaxed hair etc. which all play a key role in how straight my relaxed hair will become while preserving the texture and health in my hair.

Top 5 Contributors as to Why My Relaxed Hair Isn't Bone Straight:

1. Using a Lye relaxer - Lye relaxers provide a low degree of hair bond breakage that preserves the natural strength and elasticity in the hair. Lye relaxers tend to me more harsh on the scalp than on the hair. Less bond breakage = more structure, fullness and strength remaining in the strands.

2. Using a normal strength relaxer - Normal strength relaxers tend to process the hair slower but perfect enough to achieve my desired straightness. I don't recommend extra stretch relaxers as they are formulated to process the hair quickly increasing the chances of over-processing the hair.

3. Limited smoothing and combing of my new growth - I smooth twice in the front, smooth 3x's in the back & comb twice in the back to ensure my hair gets straight enough and not over-processed. This gives me approximately 85-90% straightness.

4. Not leaving the relaxer on for over 25 mins - I finish my relaxer process usually at the 22-23 minute mark. I don't like to leave my relaxer on longer than that out of fear of it being "too straight". This amount of processing time is perfect for me as I'm able to apply the relaxer all over, smooth, and comb with no fuss.

5. Neutralizing in 3 phases - Taking my time to neutralize my roots for a total of 20 mins ensures all of the relaxer is out of my hair and it's no longer processing my roots. During this process I also notice that the texture of my roots begin to re-appear.


Relaxer Update: Why I don't Relax 'Bone Straight' | www.Hairliciousinc.com
Freshly Relaxed - Day 3 of Flat Ironed Hair - September 2019

As you see in the picture above, there's a slight wave/texture remaining in my roots post relaxer day. To some, this may be horrific and an alarming state of panic because the "relaxer didn't take"; however, this makes me happy to know that there's texture remaining in my strands. Once you're over-processed, there's no turning back from that!

"Your hair is under-processed!", some may say. But I beg to differ, as I know for a fact I don't have inconsistent textures of various degrees all throughout my hair i.e. straight roots and ends with a puffy/under-processed texture in the middle (which requires a corrective relaxer to resolve).  The texture remaining in my hair is uniform and not overly excessive to the point where my hair is classified as under-processed or texlaxed.

Let's be real! Limp bone straight relaxed hair isn't cute! For me, not relaxing bone straight over the years has preserved the texture and elasticity in my hair making it more resilient to breakage. Too, I find that my hair styles look better because of the added fullness and body.   

Though my relaxed strands have texture, I can still achieve a straight style without the use of direct heat - if needed. My wet hair has slight waves but not enough to wear a wash n go or cause frizziness in humid climates like texlaxed hair. The way I look at it, if I want super bone straight hair, I'll flat iron it - simple! But it certainly won't be a result of my relaxer process.

So to my relaxed hair ladies, it's perfectly normal and highly encouraged to have a bit of texture in your tresses. Since I've been relaxing my hair like this (starting 2010), my relaxed strands are healthier, stronger, and thicker!


Relaxer Update: Why I don't Relax 'Bone Straight' first published on Hairlicious Inc.

Friday, September 13, 2019

How much hair loss is normal?

Affecting around 50% of women, hair loss is not talked about as often as it should be. Seeing anything from single strands to clumps left in your shower can be distressing and a knock to your confidence – neither of which we need!

But often, loss of hair is perfectly natural and healthy, so here are some answers to questions about hair loss and what amount of hair loss is normal.

Check out my video on hair loss below.

How much hair loss is normal?

Click here if you can’t see the video above.

How much hair is normal to lose?

It’s normal to loss between 80-100 hairs per day. In fact, for some people up to 150 strands come out every day, and this is still considered normal.

If you have long hair, remember that a 100 hairs will look like a lot more when they’re wound up and all curled together than if they were flat or straight.

And bear in mind that some detached hairs can get stuck in your style, so when it comes to washing your hair, there will be a lot more hair on the shower floor than you might expect.

If you have straight hair, you’ll lose hairs all day throughout the day. They’ll fall out quite easily too, and so you might not really notice hair loss when you’re washing your hair. For curly girls, because we have a lot of tangles in our hair the loose hairs detach but they can stay in the curl.

And so it’s only once we wash our hair that we notice what looks like a lot of hair loss. Plus if you’re only washing your hair every three or four days, you should expect to see 300-400 hairs coming out in the shower.

I won’t include a photo of how much hair I’ve lost to the shower but you can see it in the video.

When should you be worried about hair loss?

If you’ve noticed a significant increase in hair loss, this is when you should start to pay attention. However, there are lots of things that can cause hair loss and most of them are fixable, so you shouldn’t be too worried.

One of the biggest triggers is stress, so worrying about it is really frustrating because it compounds the problem.

Certain deficiencies like low iron can also cause hair loss and significant weight gain or weight loss can also affect your air growth.

I have a thyroid condition and anytime my thyroid is out of balance, I can definitely tell straight away because I notice it in my hair.

If you’re noticing a significant hair-loss difference, definitely go and see your doctor, and ask for some blood tests to see if you can pinpoint the issue.

Of course, there are conditions that can’t necessarily be treated or cured, like alopecia, which can cause significant hair loss. However, I’ve linked here to a video created by Sustainable Salons that really explains some of the hard-to-ask questions about alopecia and how we can all get involved to help.

If you’re noticing hair loss, the first thing to do is not panic and know that you’re not alone. More than half of women are affected by hair loss, so just start by monitoring the situation and if you see it getting worse, please see your doctor.

I hope this has helped either allay any fears or concerns you’ve been having about this issue or at least I’ve been about to point you in the right direction.

This is part of a series of Q&A stories I’ve published on hair and hair-related issues. You can check out my YouTube series and subscribe to my channel here or catch up with the other stories on the blog here.

And as always, if you have any questions about hair loss, please asked me in the comments.

The post How much hair loss is normal? appeared first on Hair Romance.


How much hair loss is normal? first published on Hair Romance

Thursday, September 5, 2019

How I Maintain THICKness In My Relaxed Ponytail

How I Maintain THICKness In My Relaxed Ponytail | www.HairliciousInc.com

This is probably the MOST frequently asked question I receive on a daily/weekly basis and - of course - it’s a valid one too. Unfortunately, many still perceive relaxed hair to be "thin", "stringy" and "limp".

Shoulder length with thin ends - My Relaxed hair prior to starting my HHJ

My thin Relaxed ends prior to starting my HHJ

While thinning and "chewed-up ends" was a common thing to witness in Relaxed hair decades ago (see above), I would say this perception is no longer the norm.  The perception that equates Relaxed hair to being thin,  pre-dates the era of ladies embarking on a Relaxed hair journey and taking the time to understand their hair, its needs etc. Nowadays, Relaxed hair automatically equating to T H I N hair is faaaaar from the truth - with the help of proper care of course!

In my opinion, obtaining and maintaining a thick Relaxed hair ponytail, or hair in general, is never accomplished by just doing “one” thing. I believe a combination of multiple things done frequently attributed to the fullness of my Relaxed hair and ends. Below, I share with you all of the healthy hair habits that I've instilled into my hair regimen contributing to my thick and healthy Relaxed hair ponytail.

1. Washing and Deep conditioning weekly - Words cannot express how important it is to deep condition your hair on a consistent basis. I know you hear it time-and-time again, but it's no joke!! For me, washing and deep conditioning on a weekly basis (using heat i.e. hooded dryer and steamer) has been a game changer. My hair gets a weekly dose of moisture and protein which helps in nourishing my strands to withstand breakage preventing damage and it increases the fullness of my strands. Also, using the 3 penetrating oils (Avocado, Coconut and Olive oil) mixed with a few of my deep conditioners has really helped to strengthen and preserve my hair cuticle from the inside out - which equals fuller healthier hair.

2. Incorporating protein in my regimen frequently - Since I began incorporating more protein (balanced with moisture) into my regimen, my hair has increased in thickness by far! Being scared of protein, to the point of never using it in your regimen, will set you up for a serious setback. Facts! Protein is great because it causes the hair shaft to swell in diameter; therefore, increasing the overall thickness of your Relaxed strands. Protein treatments fortify my hair preventing breakage. So less breakage = more hair on my head = fuller looking hair and pony overall. I always look for "Hydrolyzed protein" in my protein treatments/DC's. Hydrolyzed keratin and Hydrolyzed collagen are my favourites. Every time I do a protein treatment, I always follow up with a moisturizing treatment to soften and hydrate my hair. Balance is key!

3. Keeping my ends trimmed - Having a ponytail with "chewed-up" ends is neverrr a good look!  I maintain my ends on a cycle that works for me. I notice that when I trim every 10-12 (essentially quarterly) my ends remain at its fullest! Incorporating this "preventative maintenance" trimming schedule catches thinning or split ends before they get worse without having to do a big cut months later (better to be proactive than reactive). When I trim every 3 months, my ends remain full, my ponytail looks and feels thicker and my hair hangs better. Never skimp on your trims, your ‘future-self’ will thank you for it.

4. Moisturizing and sealing frequently - Let's just be clear, oils do NOT moisturize the hair. Period. Oils cannot hydrate the hair, only water based products can. It's important that all moisturizer's have water as the first ingredient. I personally prefer water based moisturizers that have a liquid-y consistency, typically containing Glycerin, and I seal with Jojoba oil. I moisturize and seal daily, if not every other day. Moisturizing and sealing has increased the elasticity and fullness in my strands due to the increased moisture levels. Increased moisture levels = prevents breakage = less thinning = fuller hair. Just being consistent with this simple hair habit has kept more hair on my head and less on my clothes, bathroom counter and floor.

How I Maintain THICKness In My Relaxed Ponytail | www.HairliciousInc.com

5. Stretching and using a "Normal" strength relaxer - Relaxing at 10-12 weeks post Relaxer has always been beneficial for my hair and hair type. Stretching out my Relaxers gives my new growth a chance to grow in fully and become "visible" enough to apply the Relaxer touch up to my new growth ONLY. Relaxing sooner, with no visible new growth, can cause overlapping (relaxing previously relaxed hair) which can lead to over-processed hair which causes thinness, breakage and overall damage to your Relaxed hair. So avoiding the entire over-lapping and over-processing drama, has allowed my strands to remain at its fullest. Also, Normal strength relaxers process slower, in comparison to Extra strength. Slower processing time translates to more texture remaining in the hair after a relaxer touch up. More texture = fuller, thicker hair & ponytail.

6. I prevent "Relaxer run off" - I do no relax my new growth without my ends being protected from the Relaxer. Relaxer run-off is a term used to describe the process of when you are rinsing out the relaxer and the possibility of the relaxer "re-relaxing" your strands/ends as it's being rinsed from the hair.  As mentioned before, Relaxing previously Relaxed hair can cause over-processing which, of course, leads to thinness and breakage. I always protect the length of my hair from Relaxer run- off by creating a barrier between my hair and the Relaxer. I always coat my ends with ROUX Porosity control and DAX (petroleum based hair grease) for maximum protection. This layer of protection prevents the Relaxer from penetrating and processing my ends. As a result, my ends remain full!

7. Doing Scalp massages - After wash days, I typically like to massage my scalp with Jamaican Black Castor oil. I find that massaging my scalp with JBCO, in a gentle circular motion, stimulates my scalp and increases the blood flow to my hair follicles. As a result, I noticed that my hair growth rate has sped up and the density of my hair has increased for an overall thicker ponytail.

8. I Protective style weekly - Approximately 4 days of of the week my hair is in a safe protective style. By safe I mean a style that will not negatively impact the health of my hair/ends i.e. bun, clipped up etc. I rock protective styles so that my hair is off of my shoulders and not rubbing back-and-forth against the fabric of my clothing (causing friction, tangles, dryness etc.). This simple hair habit, preserves the healthy of my ends as they are shielded from the elements. Too, the moisture levels remain higher in my hair as opposed to having my hair loose and hang down (my hair will lose moisture quicker). More moisture = less breakage= less thinning = fuller ponytail!

Having a full Relaxed ponytail is POSSIBLE! Be Intentional and Be consistent.

Remember: Wigs, ponytails, weaves will fade but investing in your own hair will NEVER go out of style!


How I Maintain THICKness In My Relaxed Ponytail first published on Hairlicious Inc.

Tuesday, August 27, 2019

How to wear a headband without feeling like Alice in Wonderland

Hair accessories instantly dress up any style and make it look cooler and more stylish. While hair clips are popular at the moment, don’t overlook the simple headband.

Headbands can add an element of sophistication to a style that may look a little plain on its own or that you want to make a little more grown up. They also hold the style easily and can work into an over-all outfit well too.

What I’m wearing

Headband: Morgan and Taylor – they always have a gorgeous range of on-trend hair accessories and hats

Dress: Little Party Dress – my new fave independent dress shop run by a very cool chick.

Sunglasses: Tom Ford from VisionDirect – great value glasses and sunglasses, and check out their new range of frames made from recycled fishing nets

How to wear a headband without feeling like Alice in Wonderland

Headbands can be added to almost any hairstyle, but you don’t want your style to feel silly or twee. Here are some tips for how to make headbands work and have them look even better in your hair.

Leave some hair in front of the band

While I head band can hold your hair, it’s cooler if you have some pieces of hair out to frame your face.

Add a headband as a final touch

Style your hair and then add the headband as the last thing. With curls, a headband can accentuate the style and control sections that feel a bit wayward. In straighter hair, it can give the style more shape, texture and body.

Integrate the headband into your style

Although you can add the headband as a final touch, you can also braid over it or around it to create an integrated style. This makes the headband feel more purposeful and part of the style you’re going for.

Play with textures

Choose a velvet or textured fabric to add more interest to straight hair, and in curly hair satin and silk headbands add shine. Look for fabrics that work with your outfit. However, you don’t have to have a matching headband.

Pattern Clash

Don’t be afraid to clash patterns with your hair accessories. We can keep it simple like mine in black velvet or go crazy with different prints and patterns. Depending on the look you’re going for, a headband with a conflicting colour, pattern or texture can really liven up an outfit.

How do you feel about the new trends for hair accessories? How do you wear your headband?

PS. Wondering how to get these waves? Check out my tutorial below.

The post How to wear a headband without feeling like Alice in Wonderland appeared first on Hair Romance.


How to wear a headband without feeling like Alice in Wonderland first published on Hair Romance

Monday, August 26, 2019

How to Rock the Blue Hair Trend

via When it comes to hair, blue can be a challenging color to pull off successfully. It’s hard to find a shade of blue that doesn’t clash with your skin tone or come off looking costume-y and overwhelming. That being said, blue hair can also be very flattering. It’s a fun, trendy hair color that […]

The post How to Rock the Blue Hair Trend appeared first on Hairstyles Weekly.


How to Rock the Blue Hair Trend first published on Hairstyles Weekly

Saturday, August 10, 2019

Video: "Ends Tucked Under" Protective Style Bun | Relaxed Hair


Hey loves! I’m close to 8 weeks post relaxer and during this time I like to keep my new growth soft, manageable and my ends tucked away.

Today, I’ll be showing you how I do my “ends tucked under” bun protective style. I've shown this look before on my Blog and Instagram and since then I've received a lot of requests to do a tutorial. It's finally here :)

This is a really simple look that I like to do every-so-often. When I wear this bun my hair retains moisture, my ends are not exposed to the elements and my hair is off my shoulders in a cute, chic look!

Products Used:

Scurl No Drip Curl Activator - Moisturizer
Keracare Essential Oils - Sealant
Eco styler Olive oil + Black Castor Oil Gel - Smooth down edges

Check out my tutorial below on how to achieve this look!


Thanks for watching :)

Video: "Ends Tucked Under" Protective Style Bun | Relaxed Hair first published on Hairlicious Inc.

Saturday, August 3, 2019

50K YouTube Subscribers - Thank you!

Feeling really humbled right now to hit this milestone💫

Words can’t even begin to express the gratitude and appreciation I have for each and every one of my subscribers! No seriously, you guys are dope! From your overly generous compliments to your desire for more videos and quick sassy clapbacks towards natural nazis'...you guys have my back forreal - I'm honoured and grateful!


Your love and continued support does not go unnoticed. HUGE thanks to everyone who engages with me and my content - those who watch, like, share and comment under all my videos. I truly love and enjoy our conversations. Thank you! WE did thisssss!!!

To another 50K *cheers*

More videos to come! Make sure you're subscribed to my YouTube Channel: Youtube.com/HairliciousInc


50K YouTube Subscribers - Thank you! first published on Hairlicious Inc.

Friday, July 26, 2019

DIY Braided Space Buns Tutorial

The Space Buns are a classic ‘90s hair tutorial and this braided Space Bun tutorial has been highly requested.

I’ve put off recording this video for quite some time now and after filming it I remember why! It’s actually much harder than it seems. The braids aren’t that hard, and the buns are easy but being upside down for that length of time is tough.

Honestly I started to feel light headed after a few different attempts of this braid and almost fainted so if you are doing this style, please take care!

I recommend getting a friend to help or doing it in your friend’s hair instead. This way they could possibly lie down on a bed which would make it easier than being upside down the whole time.

Or if you do want to try this on yourself, see if you can get a spotter just to make sure that you’re picking up even sections and your braids are in line.

So if I haven’t talked you out of trying this ‘90s inspired hairstyle, let’s get to my braided Space Buns tutorial.

Braided Space Buns Hair style Tutorial

Click here if you can’t see the video above.

What you’ll need:

  • Two hair elastics
  • A comb,
  • And bobby pins

Step-by-step tutorial

  1. Brush your hair before you begin to remove any knots
  2. Create a centre part all the way down your hair and separate your hair into two pigtails.
  3. Turn upside down and brush one of the pigtails all the way down. Brushing the hair forward towards the ground makes it easier to pick up as you’re braiding.
  4. Starting at the nape of your neck pick up a section of hair and split it into three. This is a Dutch braid so we cross the right under the middle then the left under the right and on the third cross pick up some hair to add into the braid.
  5. Continue the Dutch braid adding in hair on every side as you go. Try to keep your braid in line with your part and keep it close to your part for a more even style. Once you’ve braided to the top of your head gather any remaining hair and create a ponytail right on top of your head.
  6. Give yourself time to stretch before going on to the other side!
  7. Now repeat on the other side create a Dutch braid going from the nape of your neck up to the top of head that mirrors the other side.
  8. Now you have both ponytails done you can stand up and we’ll finish the buns. Gently back comb the ponytail twist it around loosely and pin it in place with bobby pins.

Styling tips:

  • Don’t rush this style being upside down for that long is hard work. So make sure you take some time out or breathe in between.
  • Hairspray helps to tame any flyaways and to hold the style in place as well. If your hair is fine, use some texturizing spray and back comb a little more before creating the buns to create more of a thicker style.
  • You can also use small donut padding to create a larger bun.

And here’s another photo of my friend Flo. She had a haircut shortly after we filmed and now looks like a completely different dog!

This cute pupper belongs to our friends here in England and if you watch to the end of the video you’ll see some funny bloopers from her.

I’m really keen to see if you try the style in your hair or if you do it in a friend’s hair. Tag me @Hairromance on Instagram or send me a photo of the style.

Have fun with your hair!

The post DIY Braided Space Buns Tutorial appeared first on Hair Romance.


DIY Braided Space Buns Tutorial first published on Hair Romance

Monday, July 15, 2019

How To Get Volume In Curly Hair Using Clips

Volume in Curly hair

How to get volume in curly hair is a never-ending struggle for many of us.

You can create volume with products but the most effective products can’t be used when you follow the ‘Curly Girl’ routine. But there is a product-free way to get extra volume in curly hair and that’s using clips when you wash your hair.

My latest video is all about how to get volume in curly hair using clips. It’s also a kind of apology to curl clips from me as well.

You see, I recently filmed my current curly hair routine video and I realised that I don’t use clips in my routine any more. In that video, I didn’t use them very well and I made it seem like they weren’t necessary. However they do work really well when you use them properly.

Personally I love using hair volume powders but they’re not permissible in the ‘Curly Girl’ routine and so if you’re strict CG, this curl clip tip might be the answer for you.

How to get volume in curly hair using clips

Click here if you can’t see the video above.

Which clips work in curly hair?

Flat pin curl clips

I recommend using traditional pin curl clips for this step.

There are specialist clip available such as Devacurl clips but the classic hairdressing pin curl clips work just as well and for a lot less. I bought this bulk pack of pins years ago at a hairdressing supply store and you can also find them online here and here.

If you are in Australia, Sydney Salon Supplies also sells flat curl clips here.

wavy hair and curly hair with volume

Clipping your roots when you’re drying your hair really does create more volume but if you’re always short on time (like me!) volume powders are the key to creating volume in flat roots.

Have you tried clipping the roots of your curly hair? Let me know your tips for getting more volume in curly hair.

The post How To Get Volume In Curly Hair Using Clips appeared first on Hair Romance.


How To Get Volume In Curly Hair Using Clips first published on Hair Romance